
Have you ever had an “OMG I got the shot … and it’s sharp!” kinda moment?
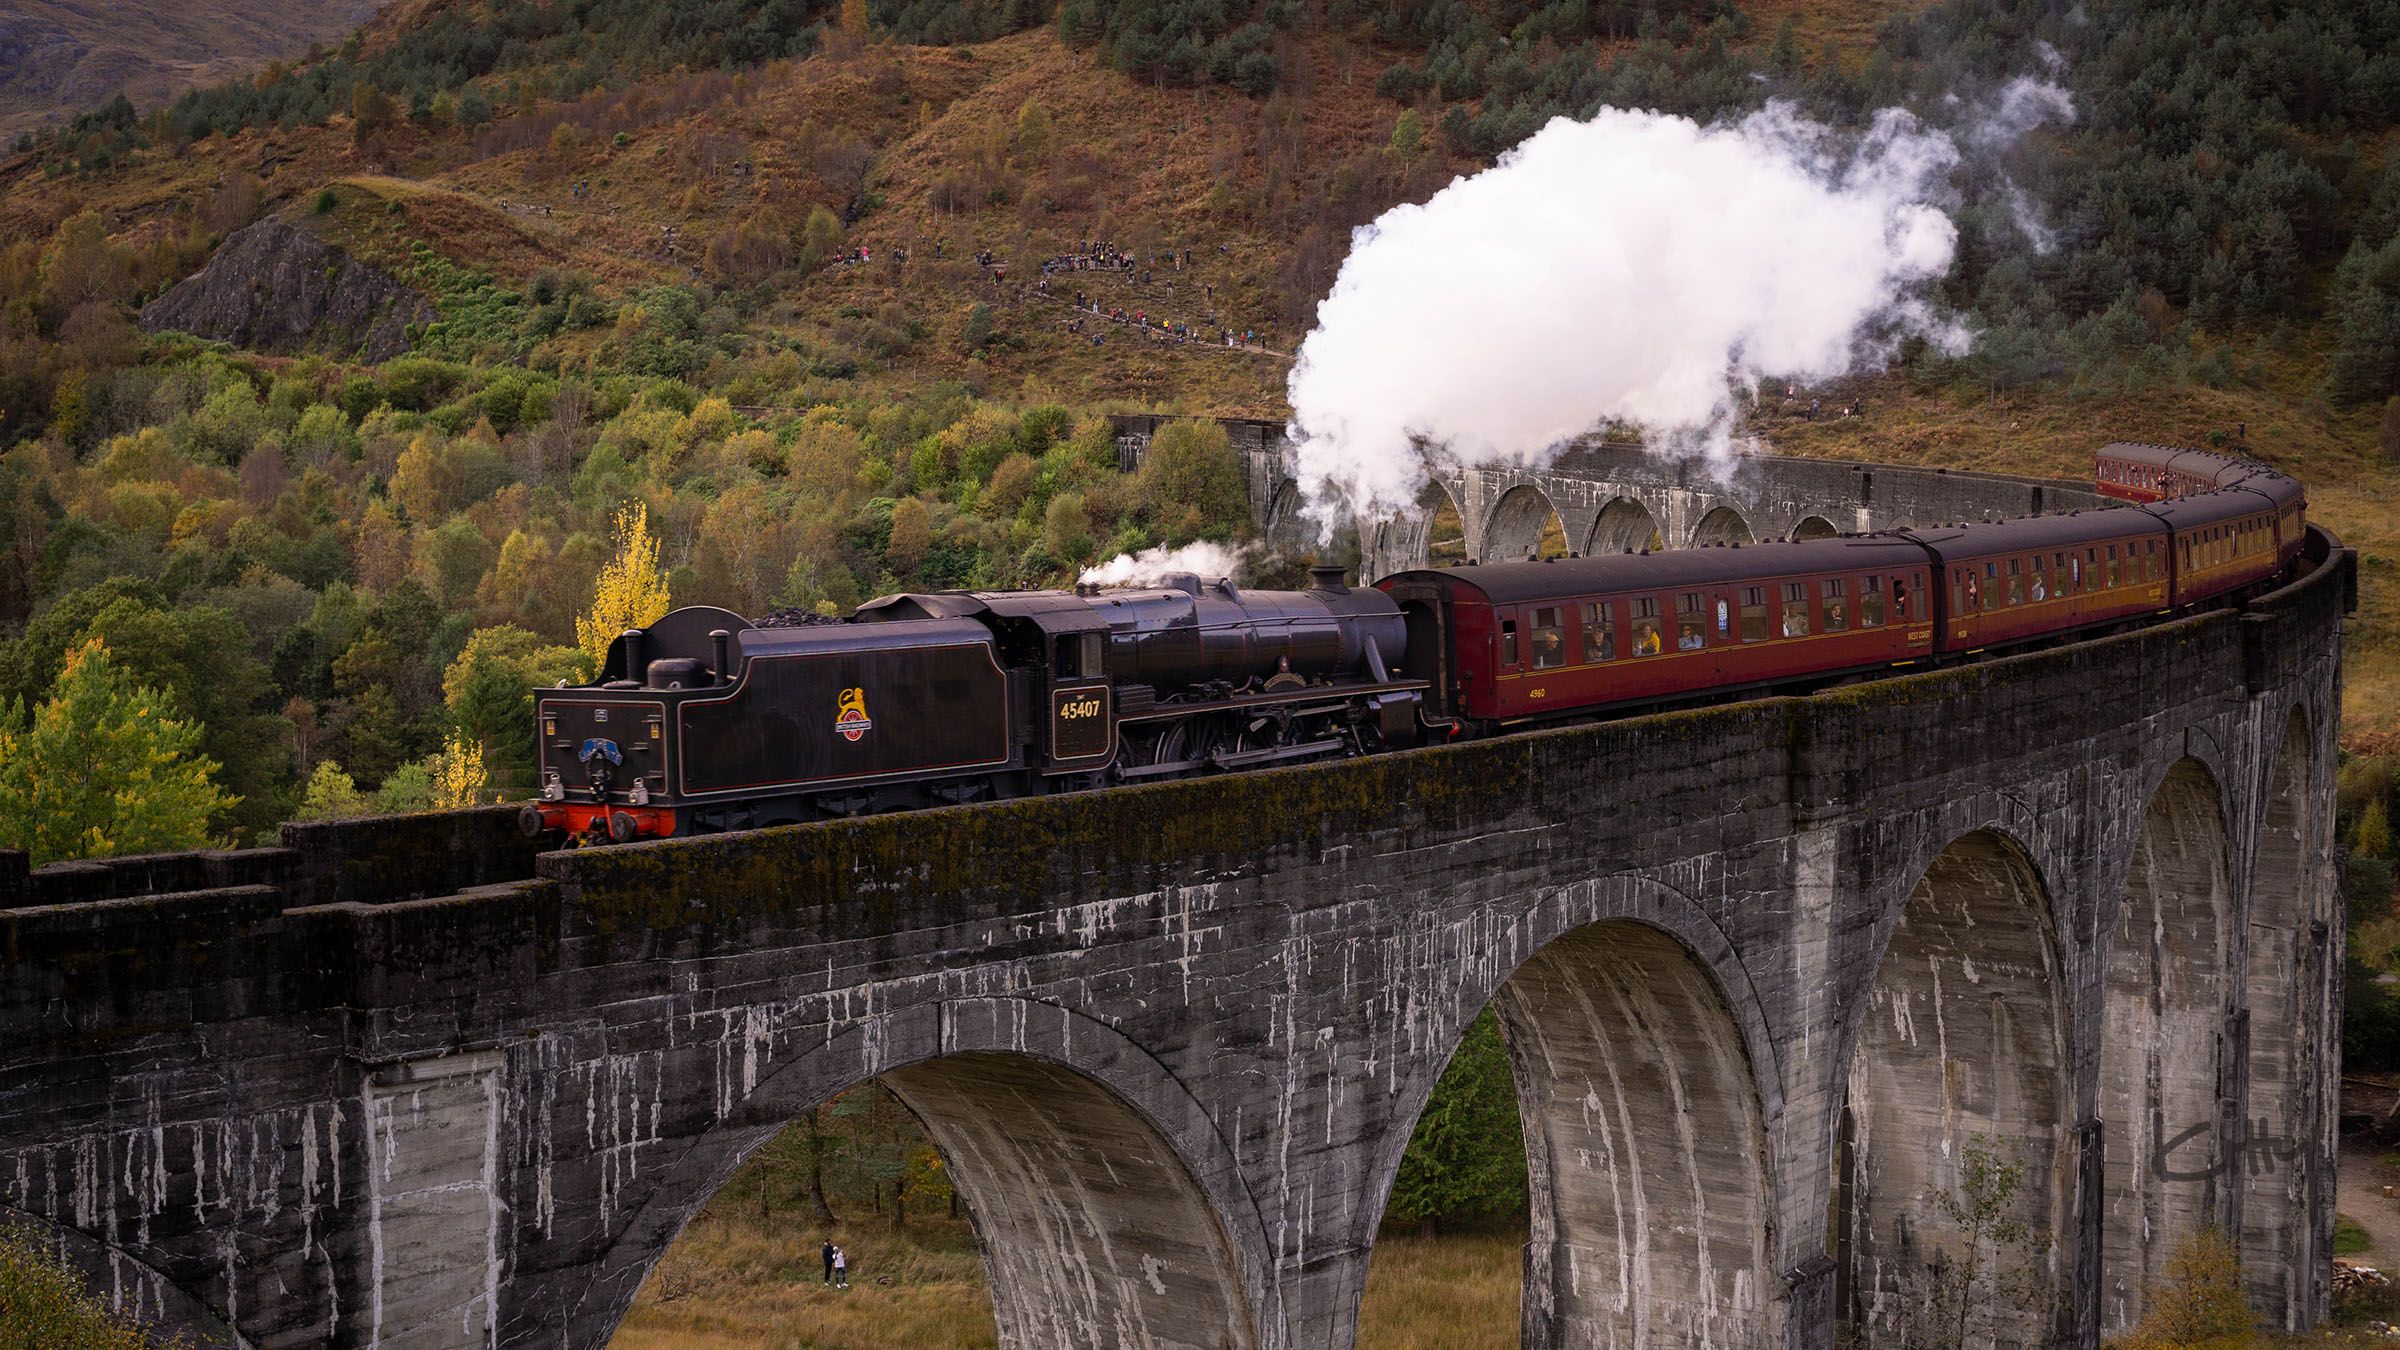
Well, that was me when I took this photo of the Jacobite steam train (more famously known as the Hogwarts Express) as it made its way across the Glenfinnan Viaduct in Scotland.
The moments leading up to it included a fall, in front everyone. So I’m glad it turned out 😂
I could attribute my success to awesome luck and timing, but no. It mostly boiled down to the planning & prep our workshop leader facilitated, along with a few other things, which I’ll go over now.
I’m sure there are differing opinions on how to take sharp photos of moving trains. So I’ll just tell you how I took this photo, which is pretty much what I would do if I had to do it all over again.
Before we go any further, I need to say… please be cautious and use your common sense. Do not stand too close to a train track, on a train track, close to a moving train, or in the path of one. No photo is worth the risk.
Alright, let’s get into it.
Research + Plan
As I alluded to earlier, taking sharp photos of moving trains depends heavily on your planning and prep. Before you go, research the train’s timetable & direction of travel. Choose your composition and know where you’ll stand. Also think about arriving early, with enough time to set up and practice.
Pack
When you’re done planning, pack your:
- camera & lens
- tripod
- shutter release cable
The camera needs to be perfectly still as the shutter opens and closes. (Otherwise, your photos will be blurry.) Using a tripod & shutter release cable improves those odds.
Set Up
Once you’re there, set up your camera, lens & tripod, attach your shutter release cable, and dial in those settings:
- high shutter speed (eg – 1/250 sec)
- wide enough aperture (eg – f4)
- a usual ISO (like ISO 100)
- continuous auto focus
- burst mode
High shutter speeds freeze movement onto a sensor, but restrict the amount of light that comes through. So you’ll need to widen your aperture to compensate.
Continuous auto focus adjusts focus whenever the shutter button is pressed halfway, and a must when photographing moving objects. Burst mode (or continuous shooting mode) is a feature that takes multiple photos in quick succession, producing more photos to choose from.
Test + Adjust
Next, take some test shots. Make sure the exposure is correct. Get a feel for the burst speed, your SD card’s write speed, and adjust everything as needed. Modify your camera settings, tripod… anything and everything before the train comes into view.
Go Time
Once it does, start firing your bursts. Even though the train may still be far away at this point, and not yet in the spot you intended, start capturing as soon as you see the train, and keep going until it leaves your frame. That way you hopefully get the composition you want, plus a lot more before and after. This greatly improves your chances of getting that perfect, tack sharp, photo. And leaves you with even more options when it’s all over.
That’s it. I hope this was helpful. Have fun photographing those moving trains!
And in case you’re wondering, I took my train photo, the one featured above, at ISO 160 | f4 | 1/250 sec.
Until next time,
K