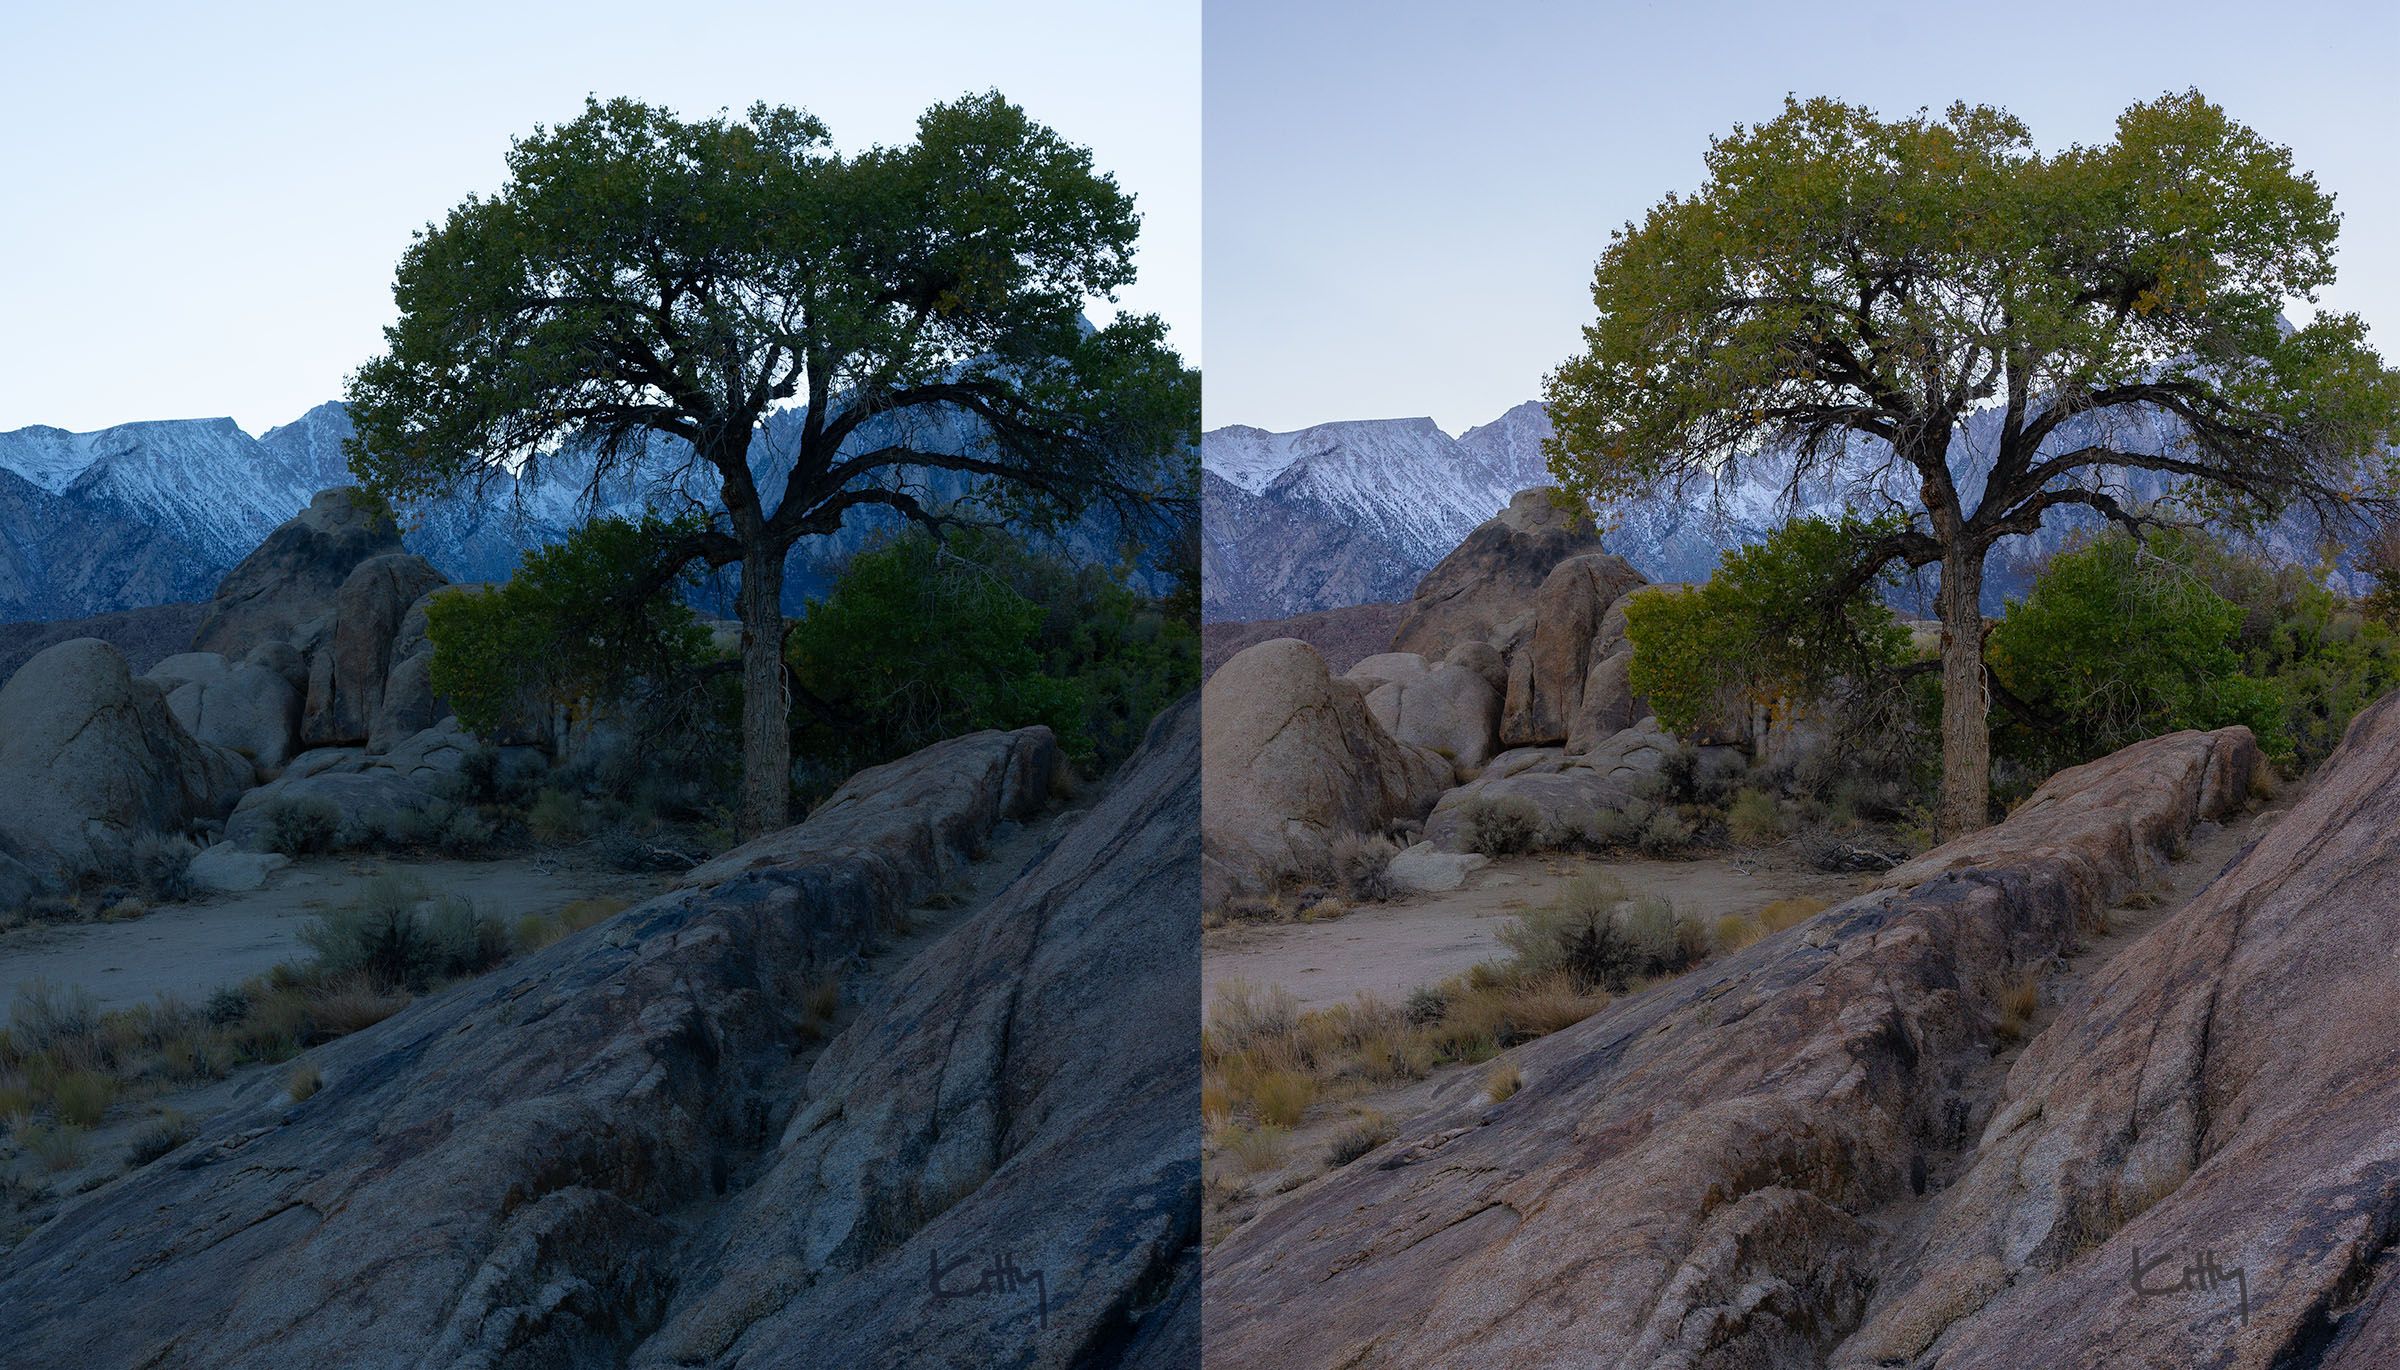


Have you ever taken a photo that looked great in camera, then weird in Lightroom?
And by weird, I mean “weird colors” weird.
There are a couple of reasons why this happens, but for me, it always boiled down to an incorrect white balance setting on my camera.
You know when you’re set for blue hour, then forget to change it back before the next sunrise shoot… and you’re so tired yet so excited and everything looked fine in the moment? Doh!
I’ve gotten better at getting it right beforehand, but I still mess up every now and then.
And thankfully, we can correct strange color casts in Lightroom: meet temperature and tint.
The first adjustments you see under the Basic panel, temperature and tint are two ways to correct your photo’s color balance.
(If “white balance” sounds confusing, think “color balance” instead 😉
Don’t get caught in the labels… “temperature” & “tint” simply describe the colors you’re adjusting.
Temperature
The temperature slider modifies your blues, yellows and oranges — the overall coolness or warmth of an image. Moving the slider towards the blue end will make it cooler (more blue), while moving it towards yellow will make it warmer (more yellow or orange). The temperature slider also helps correct color issues caused by different lighting conditions.
Tint
The tint slider controls the balance between green and magenta. Moving the tint slider towards the green end will add more green to your image. Moving it towards the magenta adds more magenta. This adjustment is particularly useful when correcting color casts from certain types of lighting. Lookin’ at you, fluorescents.
Hope this helped. I’m going to color correct a few of my photos, now. Good luck if you’re doing the same.
Until next time,
K