Before we start, I wanna say that I think the term “white balance” is confusing. “Color balance” makes more sense to me. So I’m gonna use those words instead 😉
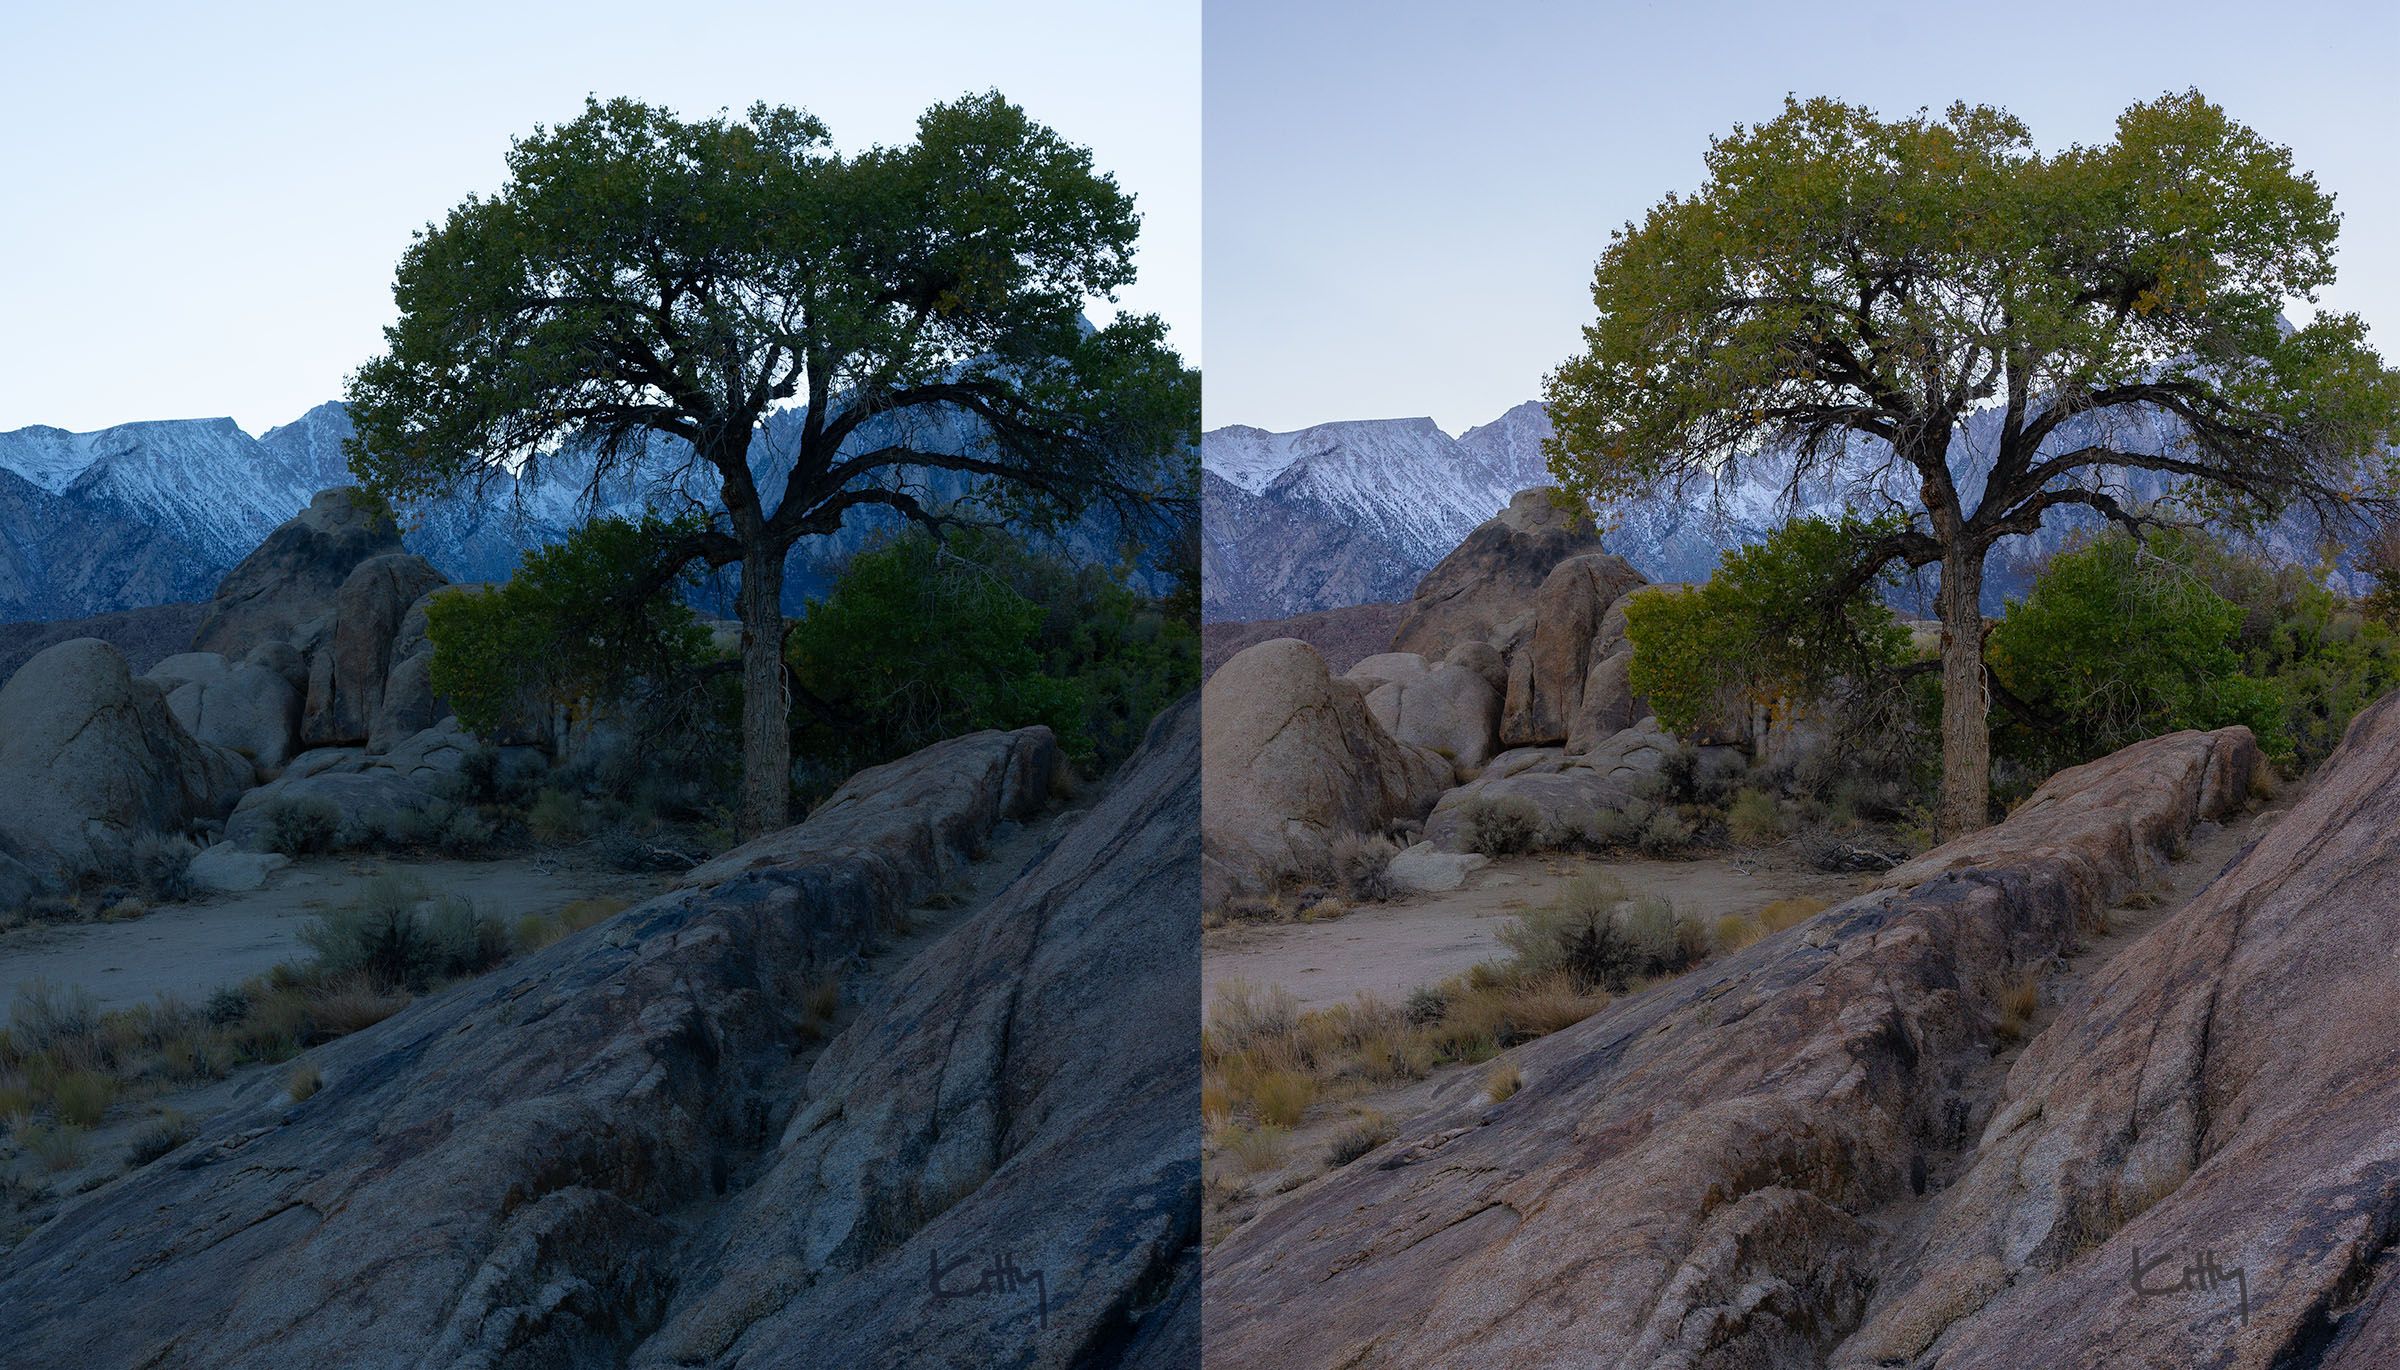
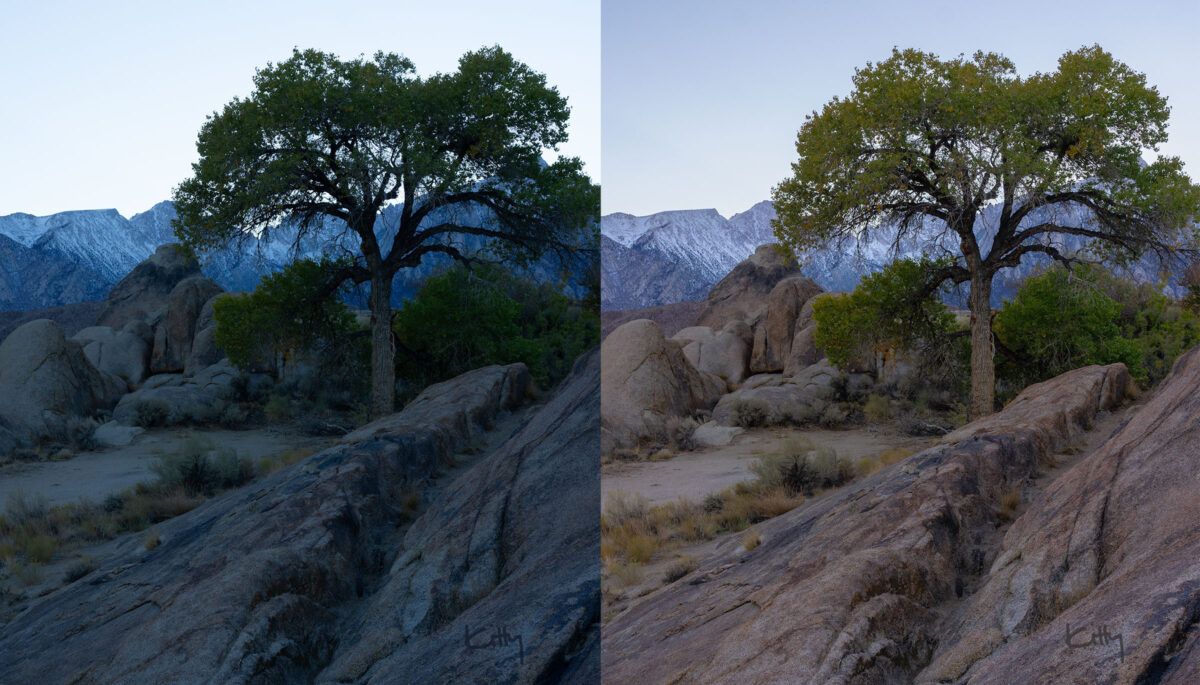
Alright, now that you know the difference between temperature & tint in Lightroom, perhaps you’re still not sure how the colors should look in your photo, or you’re uncomfortable making manual adjustments to your temperature & tint sliders.
If that’s you, try this quick trick:
- In Lightroom, open your image in the Develop module.
- Click on the White Balance Selector tool, located in the upper left-hand corner of the Basic panel.
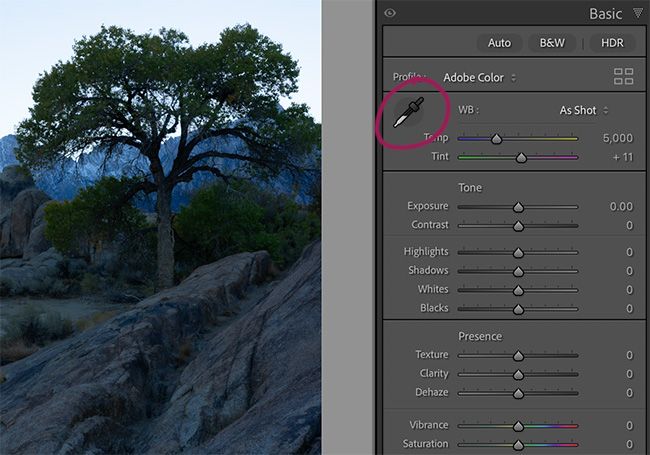
- Then click on a neutral area in your photo… something like a white wall, gray card, or any other area that should be neutral in color.
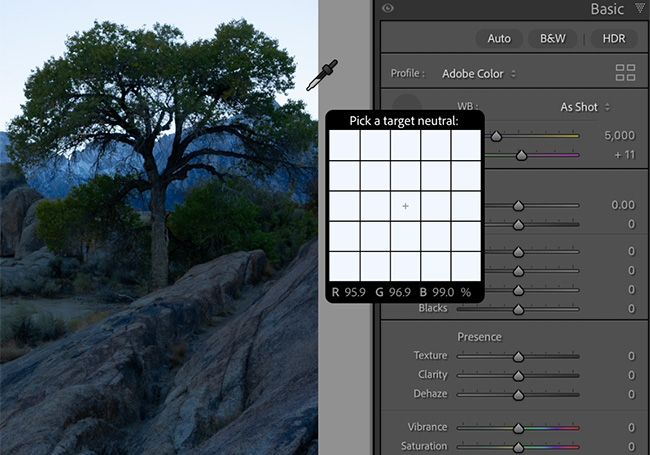
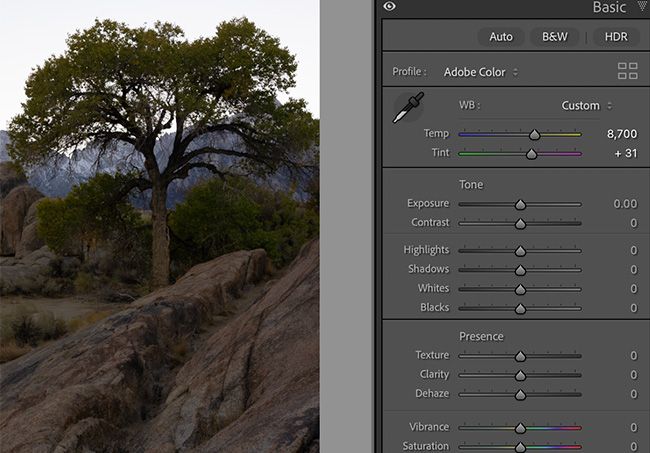
- Lightroom will automatically adjust the white balance based what you clicked.
Can you believe I didn’t learn this trick until two months ago, after using Lightroom for two years? *shaking my head*
Alright, I’ve got some more photos to color correct. See you next time.
Until then,
K